How to configure a Linked Server to a modern version of Oracle in SQL Server
Table of Contents

It definitely was his plan, all along
Following an Oracle migration to a new version (19c on AWS RDS), I had to update the related linked server in a SQL Instance, upgrading the Oracle Client to the latest version.
Doing so, I’ve come to the conclusion that Oracle purposely makes everything as obscure and overly complicated as possibile, in order to sell support. All the reference articles from the community were outdated and inapplicabile too, of course; lots of guides for 10 years old version, but nothing recent.
That’s where I come in, trying to save others (and possibly myself from the future) from all the hassle.
The official guidelines from Oracle & Others usually involve donwloading the instant client, the odbc component, installing both, configuring environment variables, download and install ODAC, configure it, etc…
I did the above, but each time I’ve incurred in different issues including:
- ODBC doesn’t connect to the Oracle Database
- The Oracle OraOLEDB provider isn’t available in SQL Server
- The configuration is correct, but queries to the linked server hangs with PREEMPTIVE_COM_COCREATEINSTANCE wait
Maybe it was my bad luck, or the configuration leftovers from the previous installation, regardless, I’ve decided to forget all of the above and start from scratch.
Where to find and how to install the right Oracle Client
The most atrocious part of my search for glory was without doubt navigating all the packages to download and install for each component, between broken links and differences between the instructions and the actual content, it’s a mess.
- Go to this page to download the client (you can’t imagine how precious is this link)
- In the search box, search for “Oracle Database Client”
- Scroll down past hundreds of unrelated results until you finally get to “Oracle Database Client”
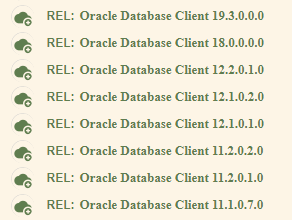
I don’t know why these appear after 240 other results when you search explicitly for this
- Add the latest version to the “cart” and proceed to the actual download page clicking “Continue”, hidden in the upper right corner of the page, after you’ve scrolled all the way up
I swear they’re doing it on purpose
- After selecting the operating system (which for you is 99,999% Windows X64) and accepting the EULA, you’ll get prompted to chose which file you want to download
I don’t know why they’re ovecomplitating it by adding a gold image to the page, but you’ll need only the first file, which contains the installer, as in the screenshot below:
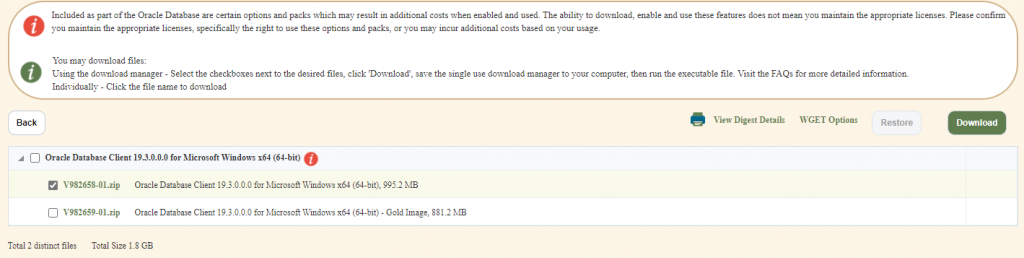
Why?
- Last but not least, of course(!) the file won’t be downloaded in your browser, but the website makes you download an executable file that downloads the files for you
Finally, after downloading and extracting the file on your SQL Server, you can launch the Setup
From here on it’s pretty easy:
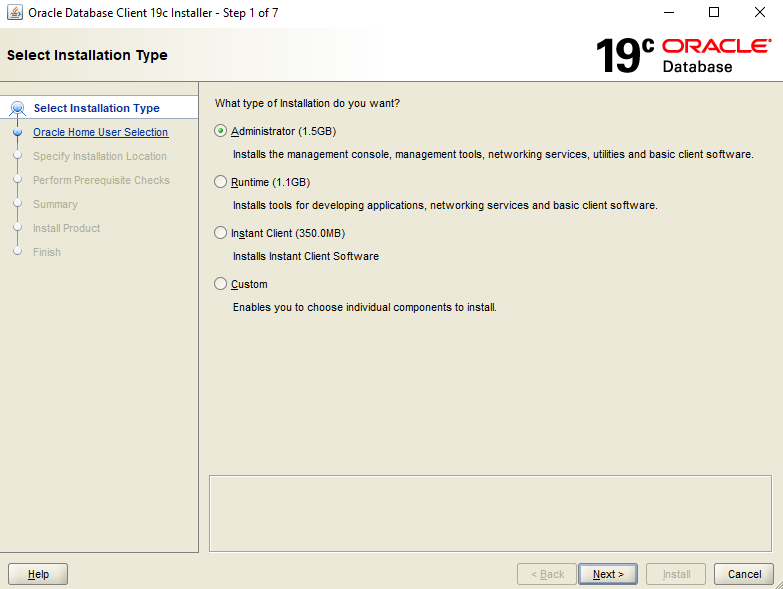
For the installation type, I chose Administrator, which includes even more than what’s strictly requested, buit given the previous experiences I didn’t want to risk having an installation with missing components.
In the next few steps it will ask you the user with you want to run the service with, that’s your preference, leave it as the default value if unsure.
The last meaningful installation configuration is the following:
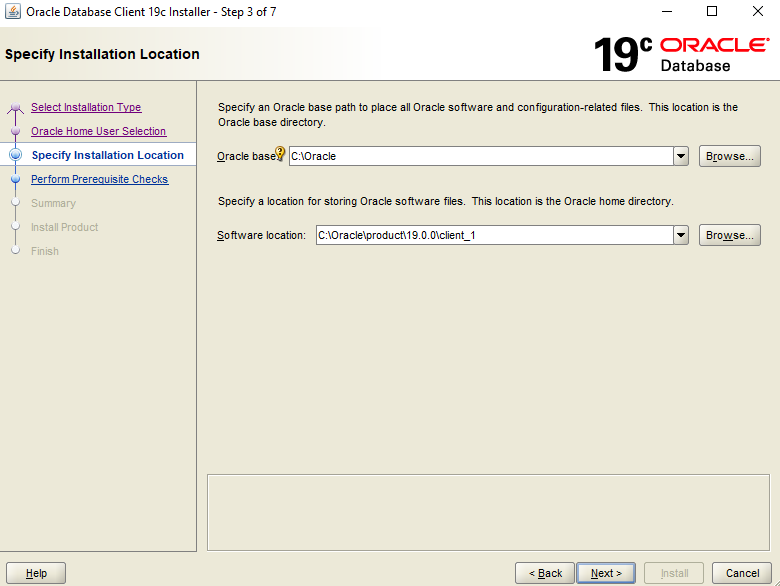
Oracle has this pecular concept of Base Folder, which is something to be remembered because you’ll need to know where this folder is for further configuration down the road, so be sure to locate it in a decent place.
Configuring TNSNames
One would expect that when configuring a data source, you choose the type and then you insert the hostname and the login info to connect, along with a few parameters maybe, right?
No, OF COURSE Oracle is different.
in theory, you should create a text file, place it in a specific directory in the Oracle Home and compile it with the network information of the Oracle server, we don’t have time for that; since I chose the full installation of the client, I’ll be using the net configurator helper app, that takes care of doing it:
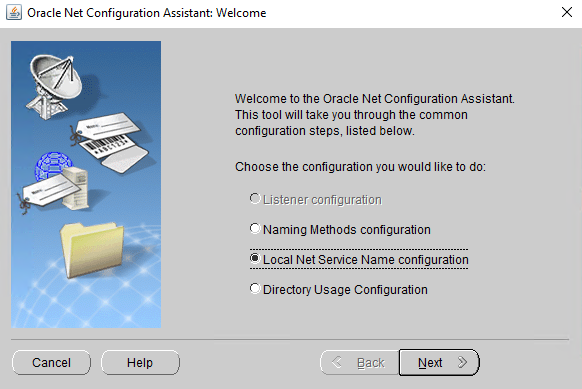
Welcome to 2021, Oracle
Select “Local Net Service Name Configurator” to configure the connection to your Oracle instance, it will ask you for the Oracle Service name, Port, Protocol and Host, all info that you should already have.
If you really wan to follow the manual way (maybe because the GUI doesn’t work, could happen), there are a lot of guides on the internet, but basically it comes down to this:
- Create an empty file called tnsnames.ora in the folder ORACLE_HOME/network/admin/
- For the installation shown in the screenshot above, the folder would be:
C:\Oracle\product\19.0.0\client_1\network\admin
- For the installation shown in the screenshot above, the folder would be:
- Open the file with a text editor and insert the connection details following this documentation, or the way easier explanation given on DBA Stack Exchange on the matter
Configure the Linked Server
If the configurations above are successful, we’re finally in the familiar part of the process, connect to your SQL instance with SSMS and launch the GUI to create a new Linked Server (right click on Linked Servers -> New Linked Server)
The general page should be configured like so:
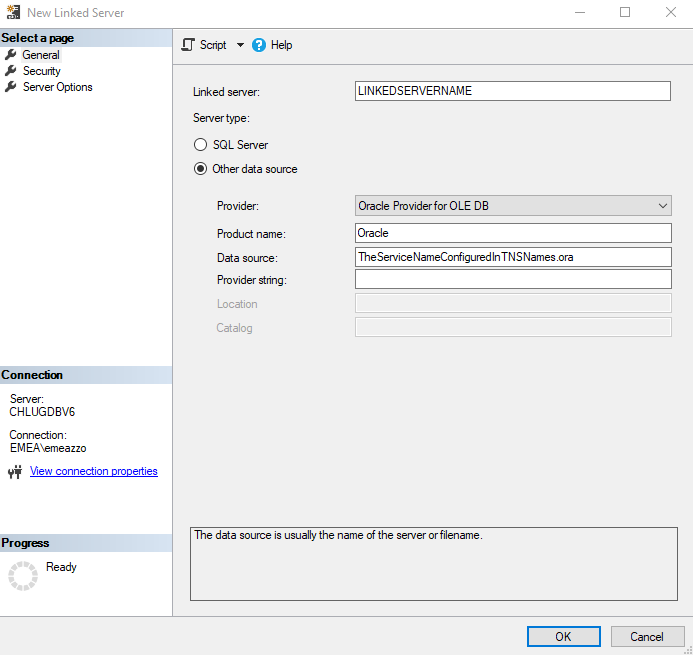
If the Oracle provider is nowhere to be found, then something went wrong with the client installation, uninstall everything and try again.
The last step is to configure the security login to the server, as in the following screenshot:
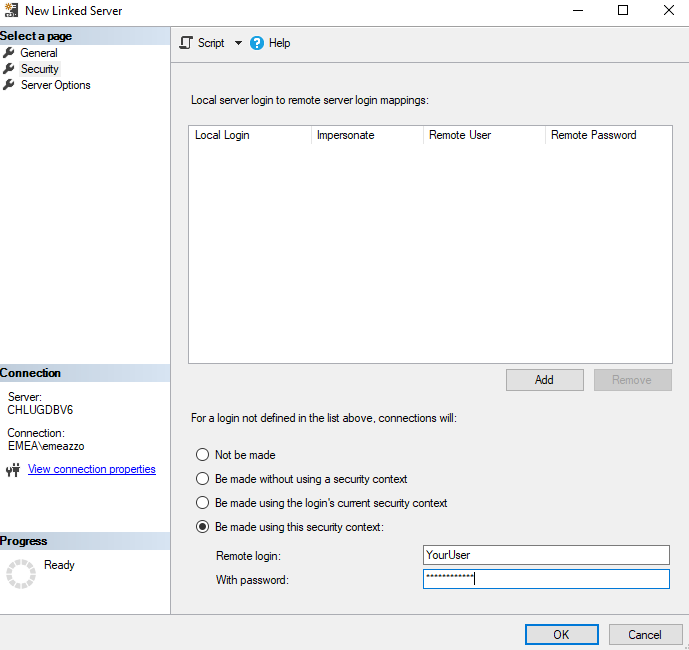
A custom security context needs to be set in order to pass username and password to Oracle for the remote login.
That’s it for the configuration, easy peasy.
Querying the Linked Server
As you may already know, but just for the sake of completeness, the linked server is queried with 4 parts notation:

Of course intellisense rarely recognizes the names and tells you it’s all wrong, but it works!
Configure ODBC
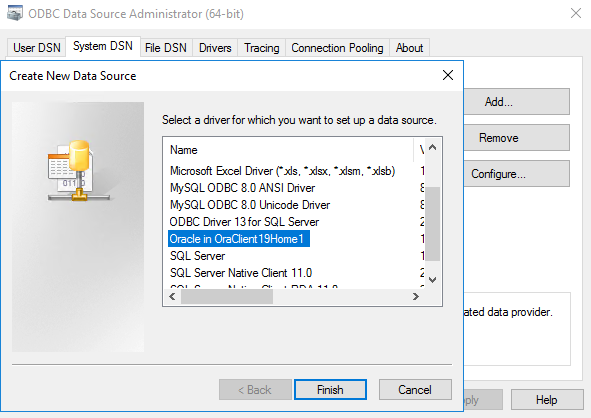
If you need to configure ODBC too for some reason, it should be easy, just open the ODBC Data Sources application and add a data source using the Oracle driver:
And proceed with inserting the requested data:
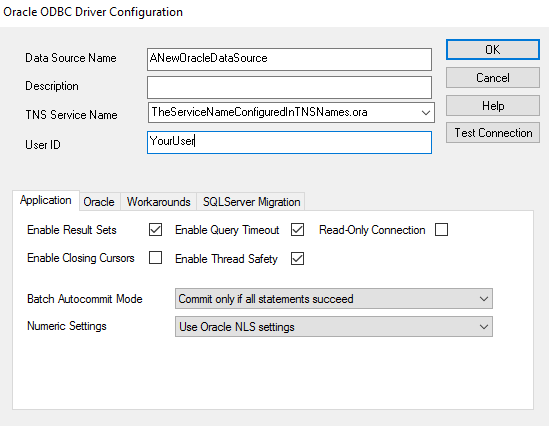
I would advise testing the connection too at this stage